Nexus镜像仓库
Nexus镜像仓库
安装
创建本地存储目录
1
mkdir -p /opt/nexus/ && chmod 777 -R /opt/nexus/
启动容器
1
docker run -d -p 8081:8081 -p 8082:8082 -p 8083:8083 --name nexus --restart always -v /opt/nexus:/nexus-data sonatype/nexus3:latest
其中:
- 8081 - nexus3 服务端口
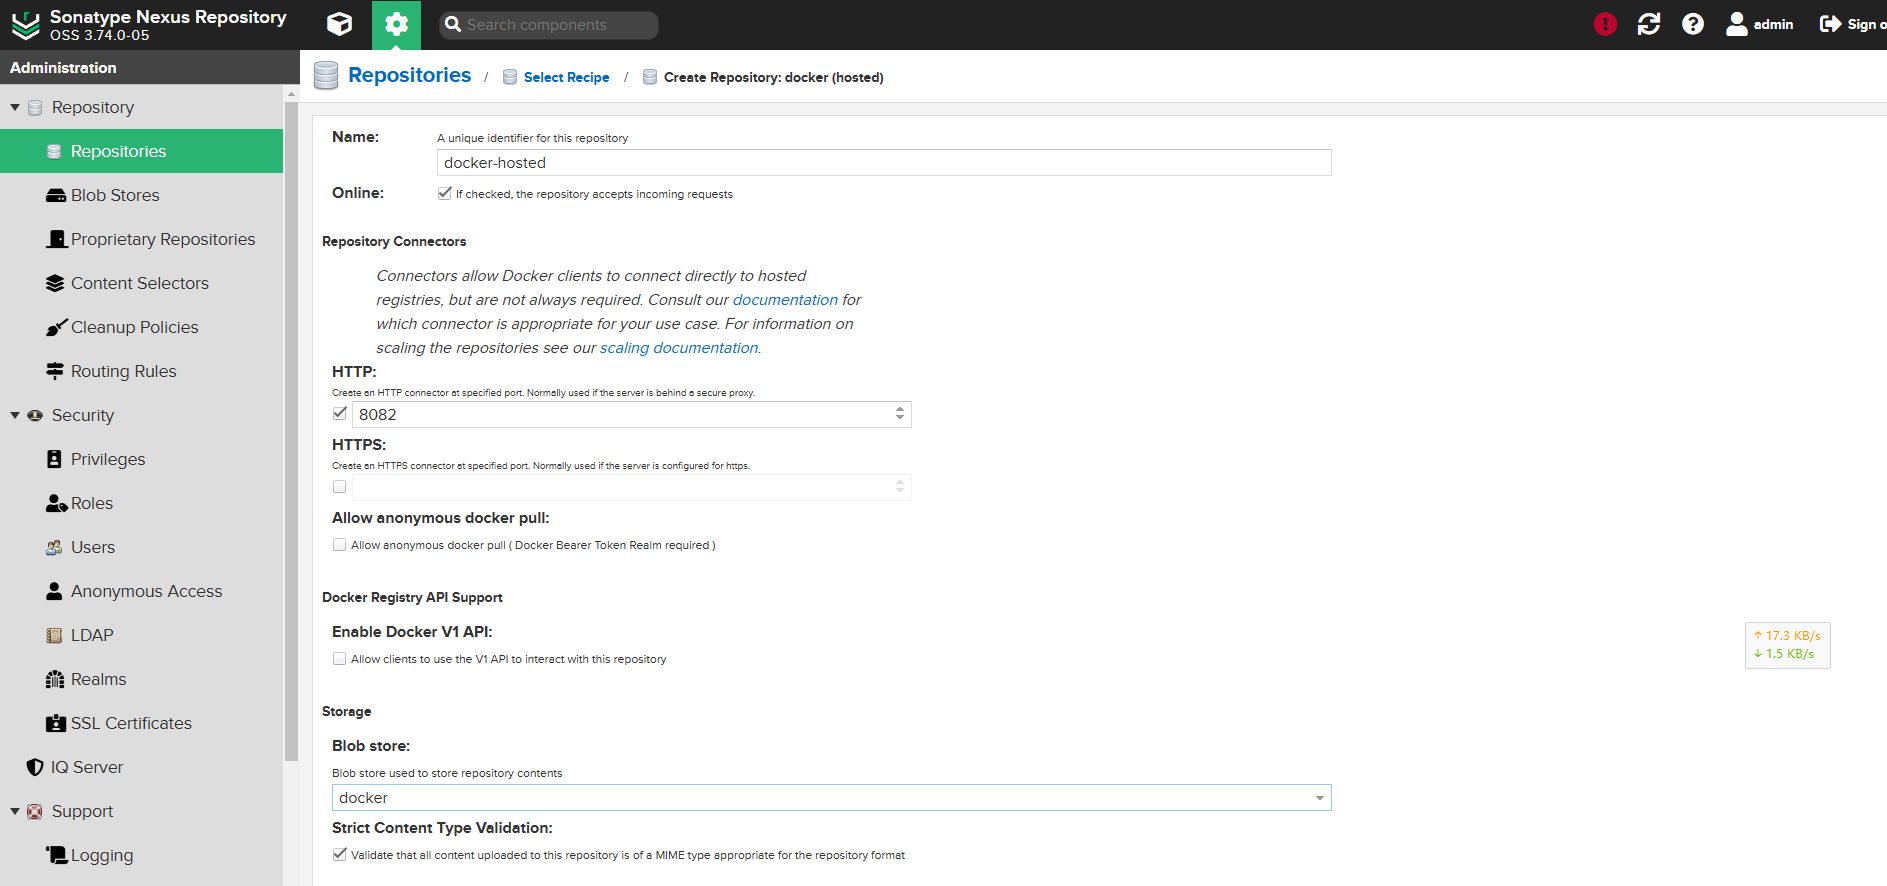
- 8082 - host 镜像仓库的服务端口
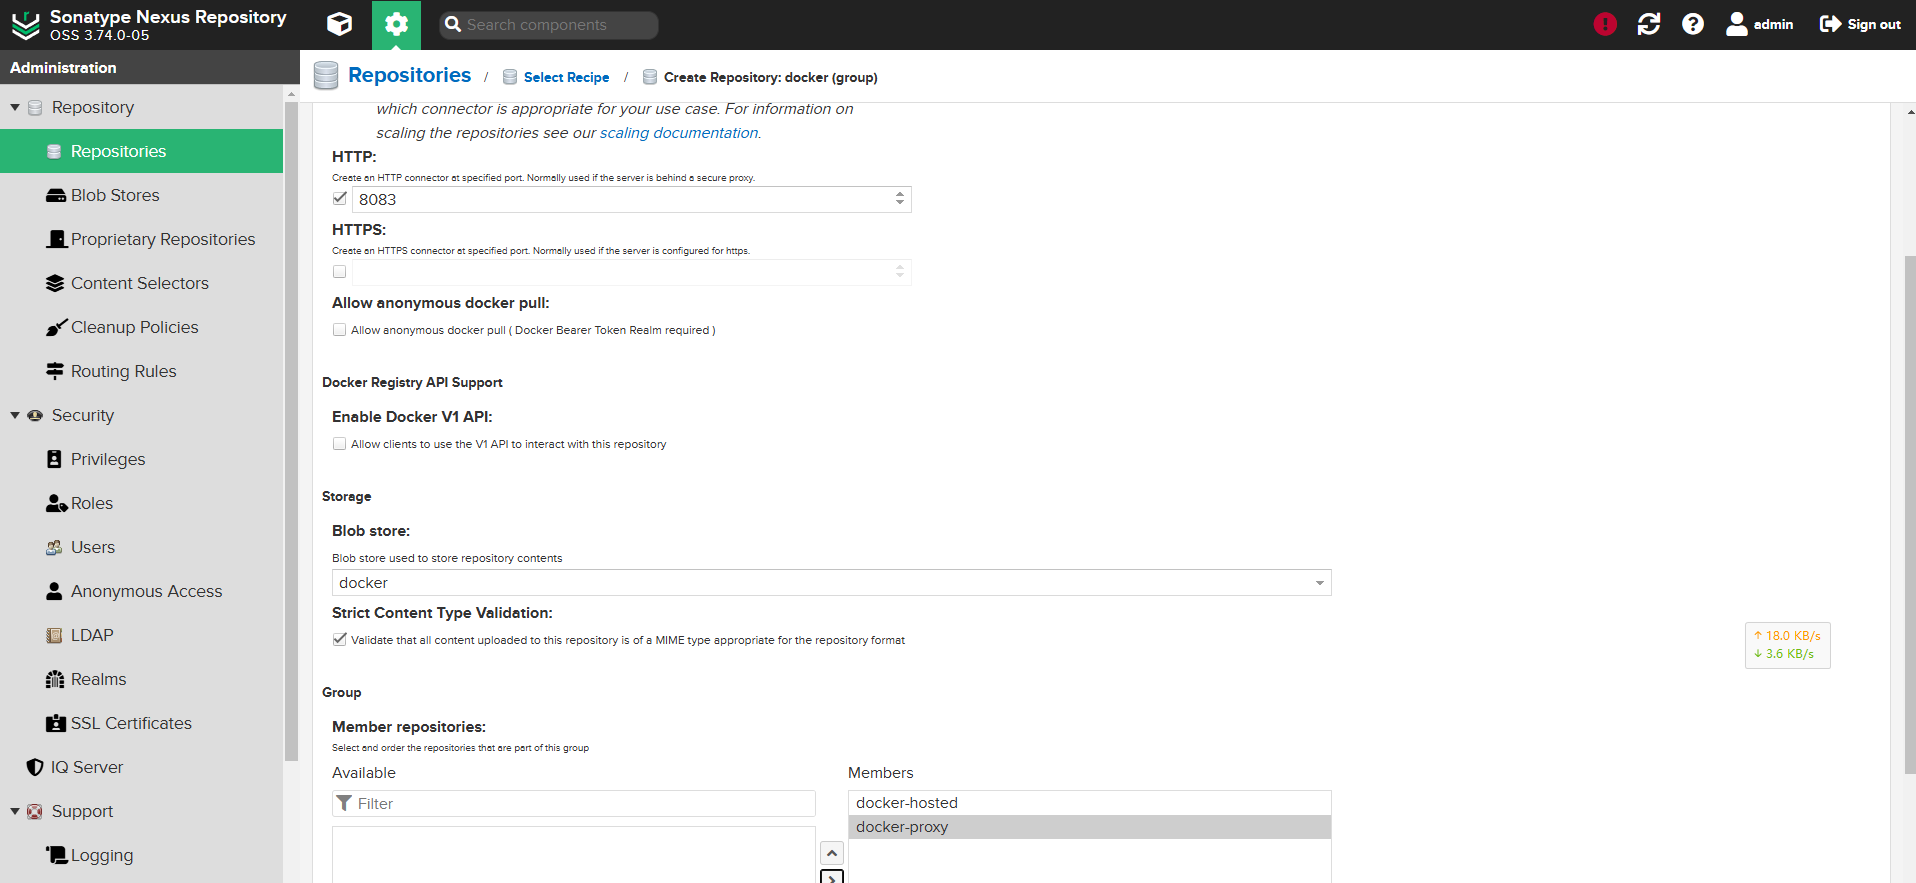
- 8083 - group 镜像仓库的服务端口
访问:http://10.1.1.110:8081/
用户名:admin
密码:终端执行docker exec -it nexus cat /opt/sonatype/sonatype-work/nexus3/admin.password查看初始密码
使用
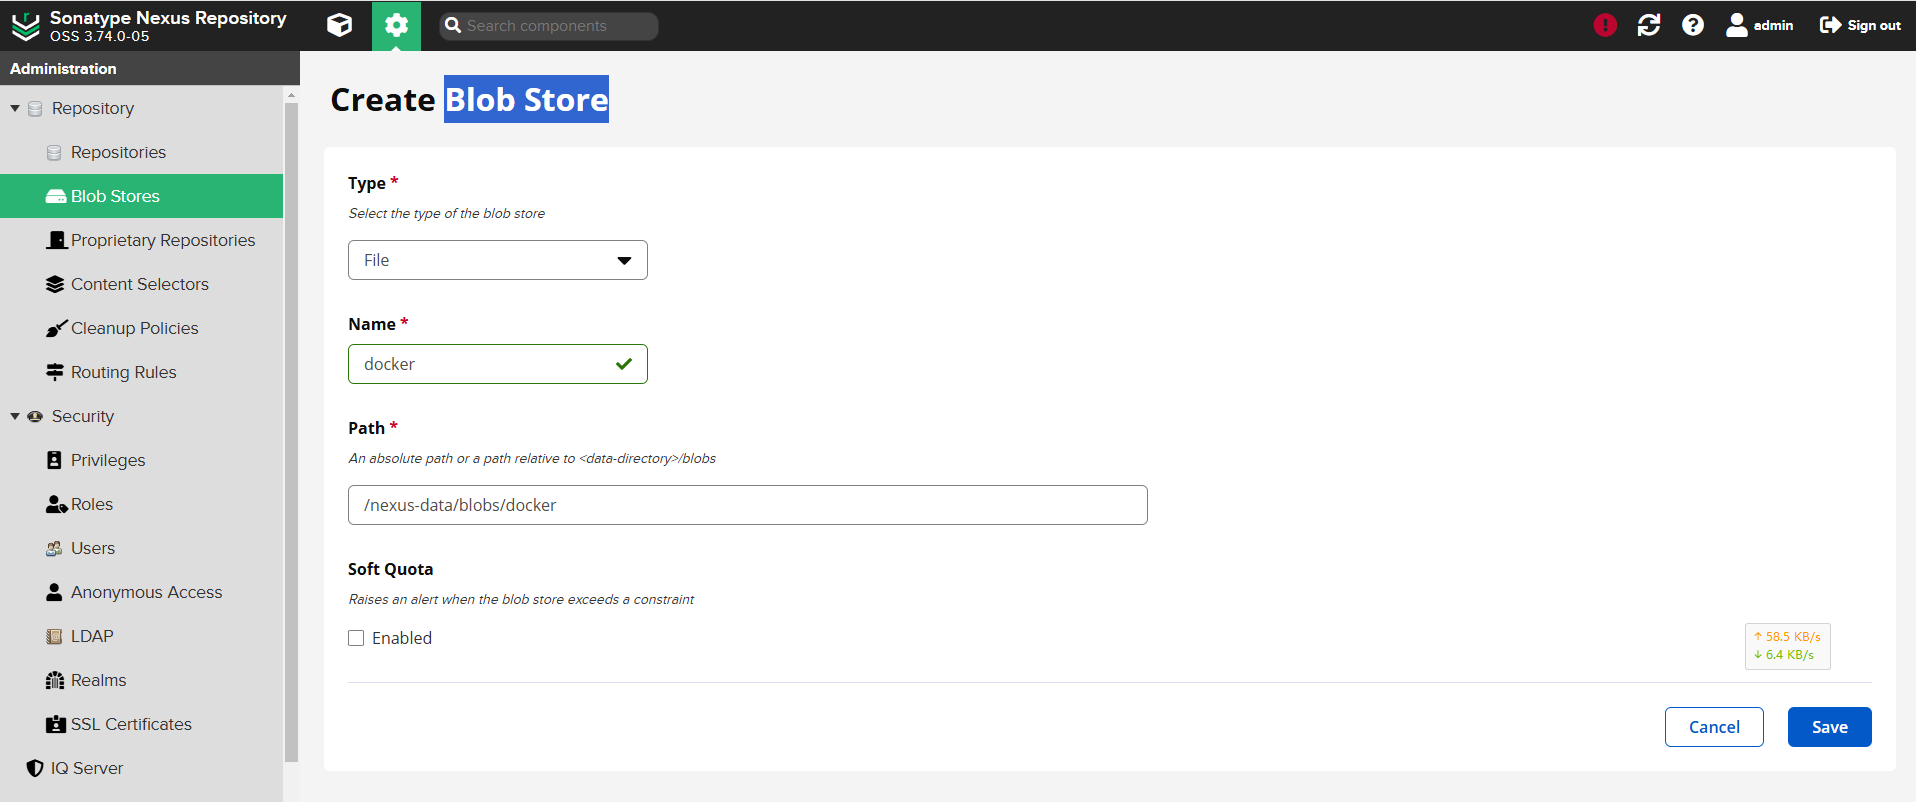
创建存储器
Repositories(Hosted本机存储)
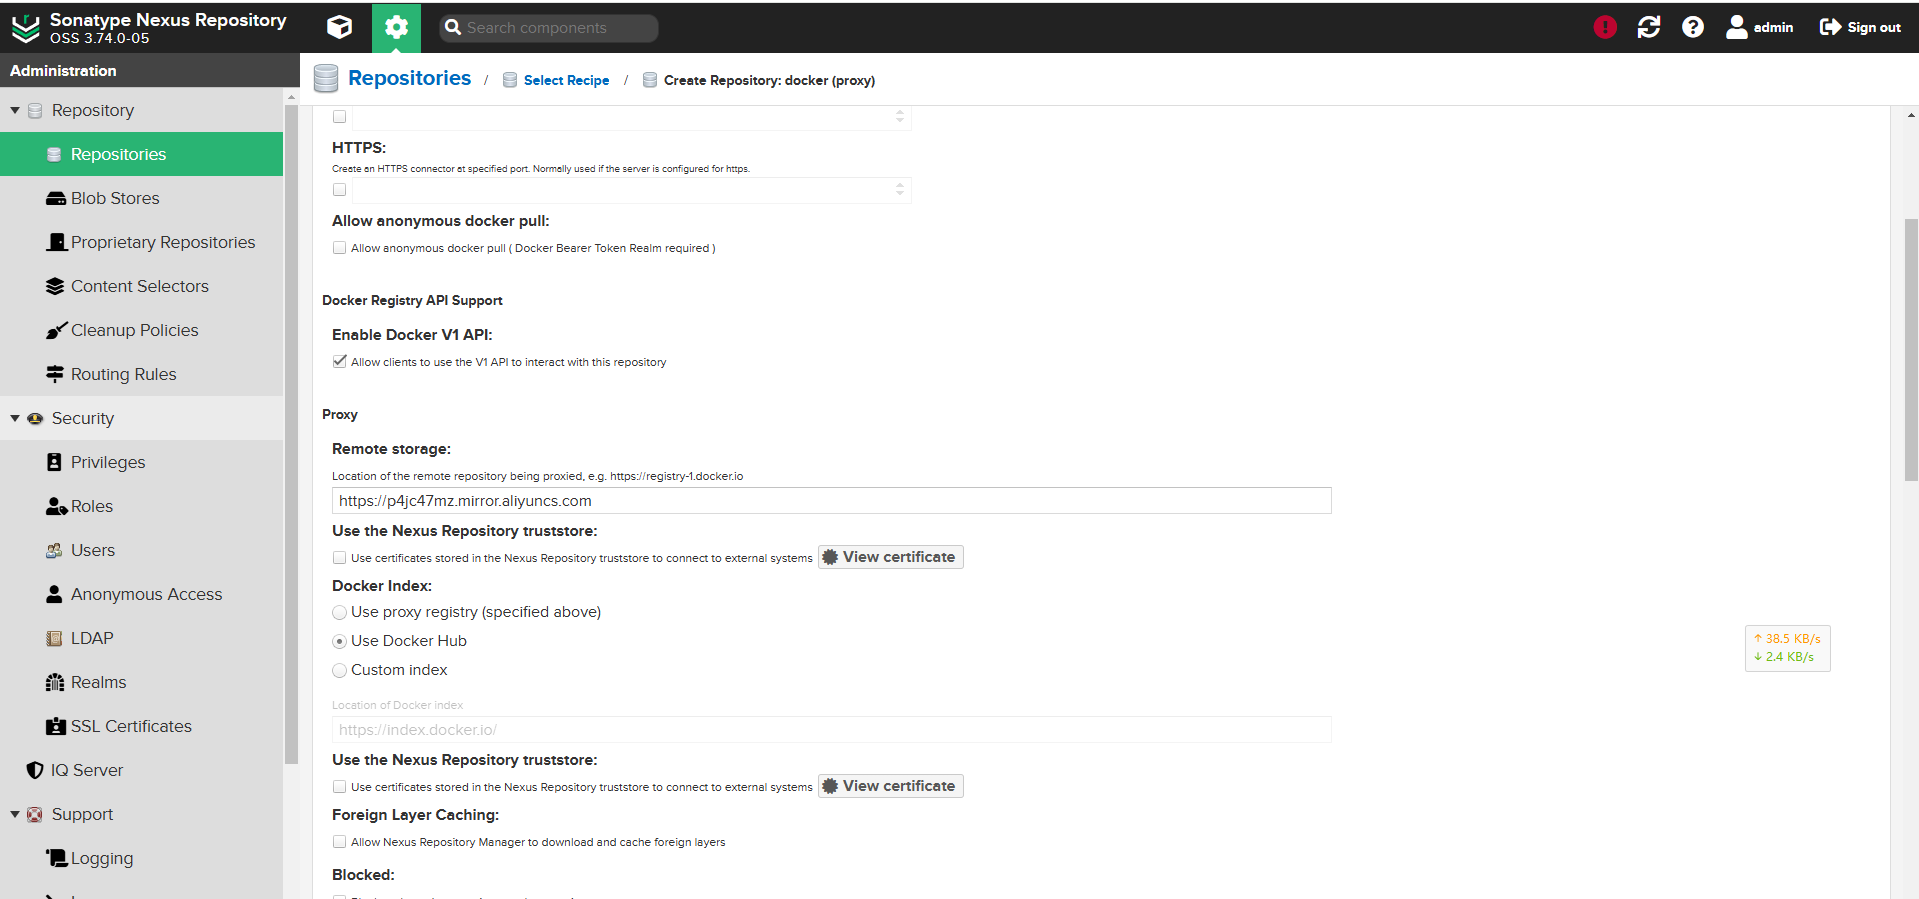
Repositories(Proxy代理模式)
Repositories(Group整合模式)
链接使用
如果是内网中使用直接登录的话会发现报错:
1
2
3
[root@rhel9 dockerfile_demo]# docker login -u admin http://10.1.1.110:8082
Password:
Error response from daemon: Get "https://10.1.1.110:8082/v2/": http: server gave HTTP response to HTTPS client
需要在客户端配置:
1
vim /etc/docker/daemon.json
1
2
3
{
   "insecure-registries":["10.1.1.110:8082","10.1.1.110:8083"]
}
重载配置:
1
systemctl daemon-reload && systemctl restart docker
再次链接,搞定!
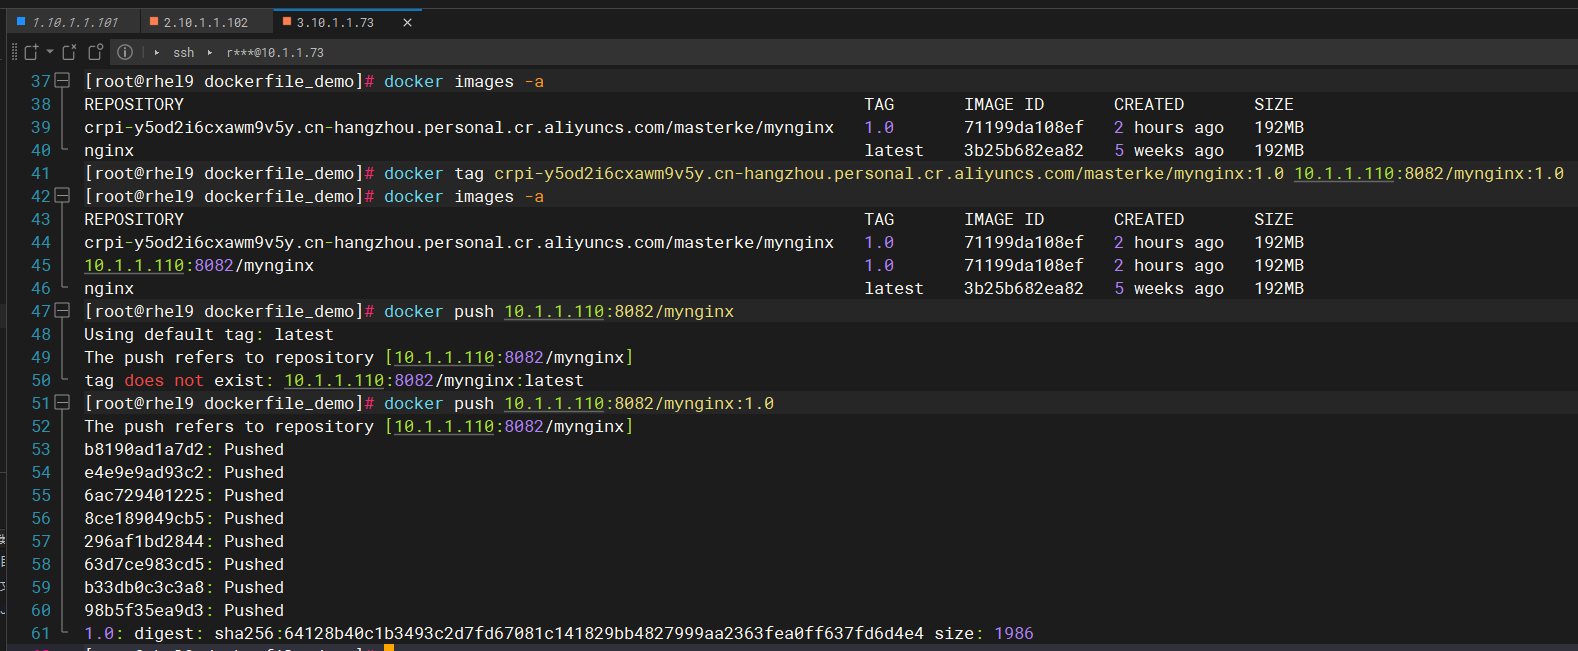
可以推送镜像上去:
也可以拉下来:
本文由作者按照
CC BY 4.0
进行授权
